Page 32 - ChipScale_Jan-Feb_2020-digital
P. 32
each design repeated 16 times. Test dies   with 64 cavities each of design B were
        were manually placed in the total of 64   manufactured, where the test-dies were
        cavities and their position within the   mounted and their alignments measured.
        cavity measured. The standard deviation   No significant deviation was detected
        of the die position for each design is   between the substrates. The positional
        shown in Figure 6.                 error of all dies in the X direction is
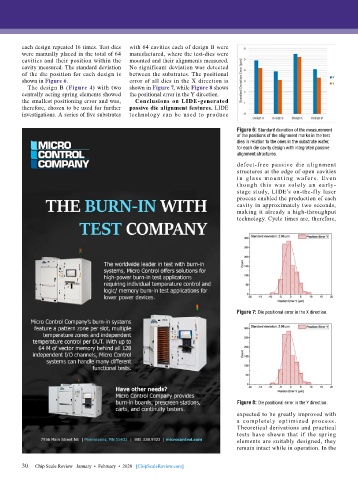
          The design B (Figure 4) with two   shown in Figure 7, while Figure 8 shows
        centrally acting spring elements showed   the positional error in the Y direction.
        the smallest positioning error and was,   Conclusions on LIDE-generated
        therefore, chosen to be used for further   passive die alignment features. LIDE
        investigations. A series of five substrates   technology can be used to produce


                                                                              Figure 6: Standard deviation of the measurement
                                                                              of the positions of the alignment marks in the test
                                                                              dies in relation to the ones in the substrate wafer,
                                                                              for each die cavity design with integrated passive
                                                                              alignment structures.
                                                                              defect-free passive die alignment
                                                                              structures at the edge of open cavities
                                                                              i n gla ss mou nt i ng wafe r s. Eve n
                                                                              though this was solely an early-
                                                                              stage study, LIDE’s on-the-fly laser
                                                                              process enabled the production of each
                                                                              cavity in approximately two seconds,
                                                                              making it already a high-throughput
                                                                              technology. Cycle times are, therefore,


                                                                              Figure 7: Die positional error in the X direction.


                                                                              Figure 8: Die positional error in the Y direction.
                                                                              expected to be greatly improved with
                                                                              a completely optimized process.
                                                                              Theoretical derivations and practical
                                                                              tests have shown that if the spring
                                                                              elements are suitably designed, they
                                                                              remain intact while in operation. In the


        30
        30   Chip Scale Review   January  •  February  •  2020   [ChipScaleReview.com]

